Sunday, March 6, 2011

Wind Damge


Our house is extremely well built, and wind is one of the things it holds up against best, but some things I have done a little differently from others have caused me a little grief this week. We had a very large set of thunderstorms come through our area and as you will see, it created a bit of a mess. While we only lost one tree, and it was already dead, the damage on the roof was a bit more of a problem.
I have placed outdoor carpeting on the roof to keep the weeds from growing, and to protect the plastic which helps to keep the dirt and roof dry. I then place large rocks on the carpeting to keep it down. It has worked well for several years, but the winds from this storm were over 60 miles an hour, and I guess I just didn't put enough rocks on the carpet in the middle section, because that is what was blown around. As you can see here, it blow over the overhang and got stuck on the chimney.


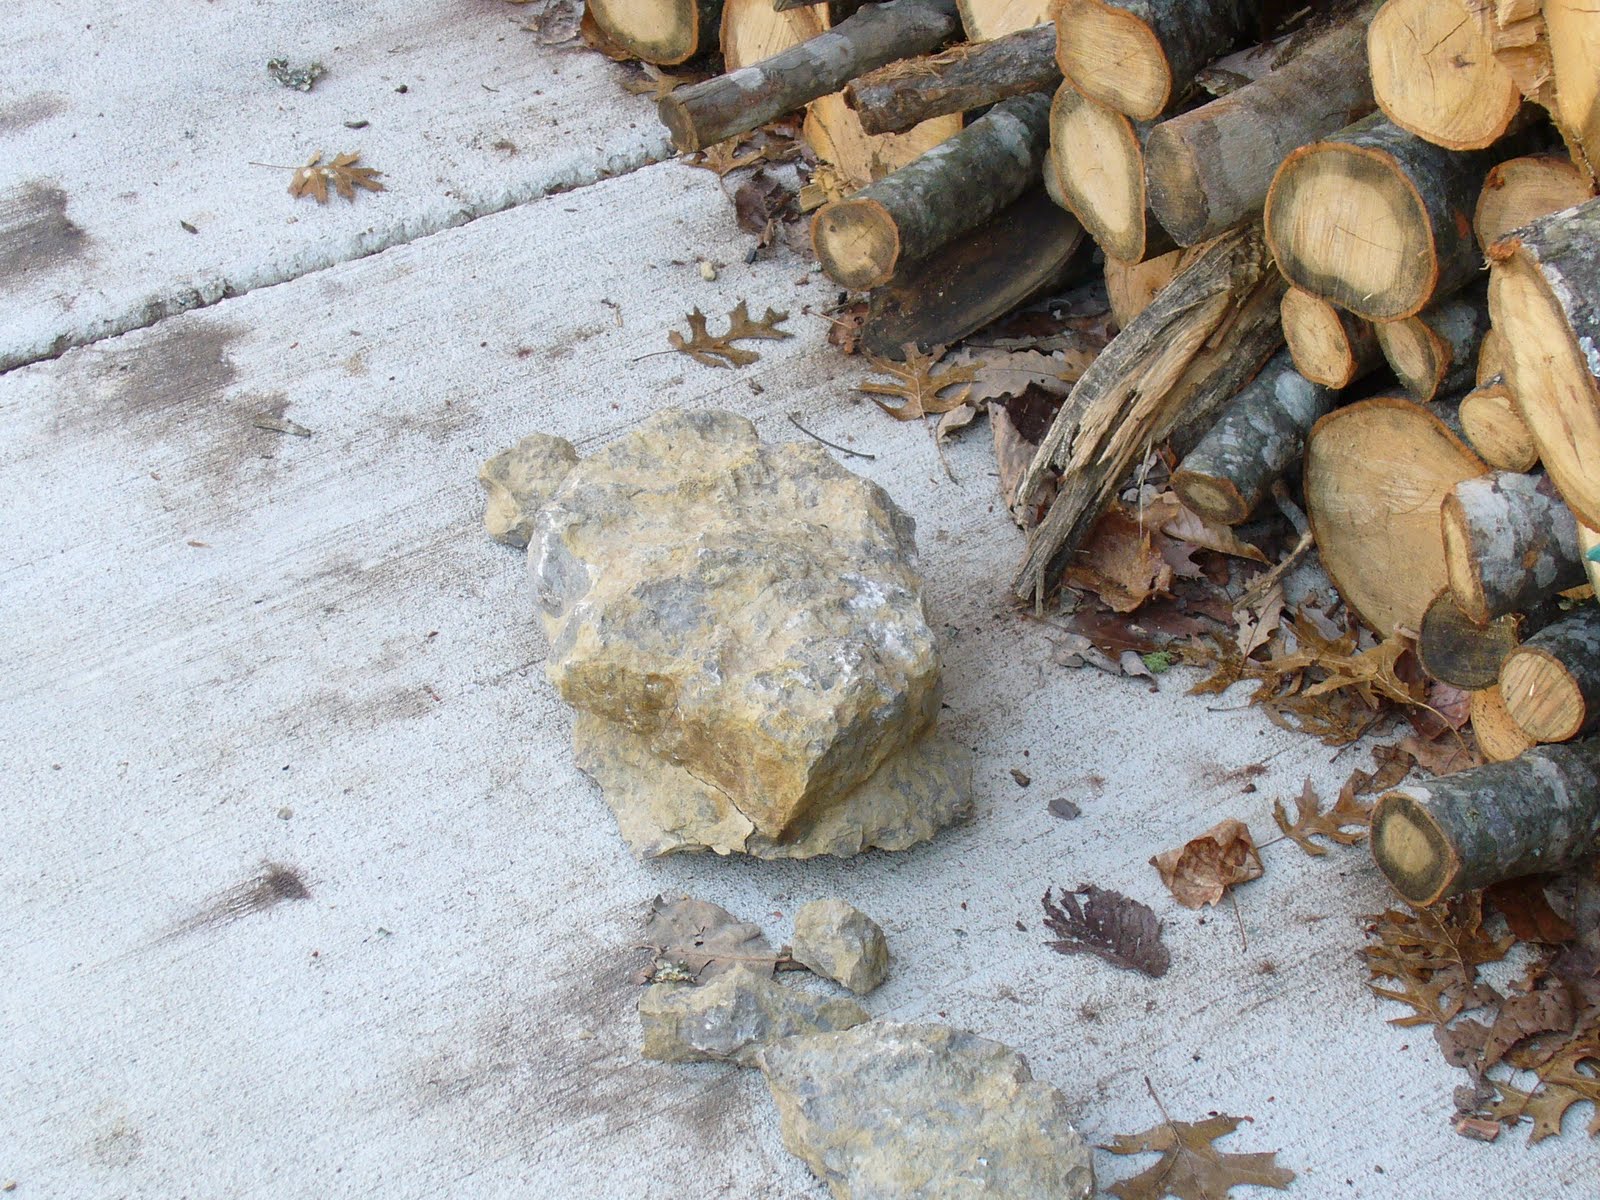
This is one of the rocks I was using to hold the carpet down. We moved it to the sidewalk, but that is not were the wind put it.
This is where the wind put it. Right onto my car. There were actually 2 rocks. The large one hit my window and hood, and then bounced over to hit our station wagon too.

The smaller, thinner one went right through the top of my window, broke my armrest, and landed on the floor of the car as you can see here.
You can see how we normally park our cars. The wind was blowing from left to right in this picture so you can see how the larger rock was able to bounce from one car to the other. My insurance is fixing my car, although I have to pay a $250 deductible, but we are just adding another set of dents to the wagon. What's one more. It already had post box damage, deer damage, tool damage, and now the rock. Some day we'll put it out of its' misery, but not for while I think.

Saturday, February 5, 2011

Winter Wonderland

I know it has been a while since I posted anything, but since we have pretty much completed the main work on the house, I have taken a long break from anything new. I think that is about to come to an end though. This winter weather has given me a few ideas that could improve the functionality of the place.

This is the most snow this area has seen in about 20 years and it sure was nice to be all snuggled up in our cozy home. Our new wood heater did a great job, and efficiently too. We have a Dutchwest model from Vermont Castings. It is the smallest one they make with a catalytic converter, but it does a great job in this style house. the heat lasts for 10-12 hours after the fire has gone out.

One of the problems we have had with the weather is that the melting snow freezes on the sidewalks at night and causes problems in the morning. I intend to fix that with gutters and a carport this spring, if my tax rebate is large enough.
In the mean time, I'm just enjoying the view and the peace and quite.

Sunday, May 16, 2010

Outside Upgrades

Once we started looking around at the house again, we realized we had pretty much neglected the outside, while we worked on the inside. Fortunately,we got a larger than normal tax return this time and put most of it into sprucing up the yard and stuff.
One of the things that I noticed was that the roof was growing a lot of weeds, so I cleared those off and completed covering it with indoor/outdoor carpet. I also put sheet plastic under the carpet to help keep the dirt dry, which is supposed to make it a better insulator. We also had to use a lot of big rocks to hold it down since the wind through this little valley can get serious at times.
Another thing we did was finish pouring the sidewalk around the house, and added a patio. I will show that later, but we were able to add a little parking pad for my trailer with the left over concrete.
When we first bought the property, I put in 2 garden boxes and filled them with asparagus, and then neglected them for 4 years. This year I moved the original 2 boxes, added another one, and replanted the aparagus.


The first box now has 4 blueberry bushes and snow peas, with a Fig Tree in the planter that will get moved later.The second one has the transplanted asparagus. I let it go to seed for a while to re-establish the roots, but I am ready to start harvesting again. We can harvest just about once a week, and since there are 13 plants, that turns into a decent side dish.
This third one is our summer box. It has multiple varieties of tomatoes, peppers, okra, and squash.
Other things we have been doing over the last few weeks are re-painting the shutters and doors to a softer grey. We didn't like the blue-grey we had.We added a fence around the utilities to cover them up.And one of the most dramatic changes has been putting red mulch in our tree ring and adding a couple of "small" rocks (I had to have a skid steer for this). Momma put a bunch of little knick-knacks in the ring. You can also see that we added more gravel around the house, and the patio and pergola are also visible in this picture.Speaking of the pergola, here are some in process shots, and some close-ups of the fancy details. Notice the yellow scaffold. It was invaluable in this project.
This picture shows part of the new sidewalk (lighter color) in front of the left module. It just happens to show 3 of the new kittens that are hanging out at our place. Last year a stray cat took up residence under a tarp we had over a bunch of stuff stored outside and dropped a load of 5 kittens. After a few weeks, she left them on their own and we took them to the Humane Society. We cleaned out the storage mess and put in a new shed (see next picture). Well, she is back living under the shed and this time dropped 7 kittens. I plan on making sure she is fixed this time before she runs off again.And lest we forget why we built this house in this place, see the view up the valley from our driveway. I look at this view every morning on my way to work.

Sunday, April 18, 2010

Finishing Touches

Once most of the work was complete, we took a break for a few months. We need to refinance, if we can, so we looked around at how the house might look to an appraiser, and decided we needed to spruce up a bit.
These pictures show the tiles we added to the kitchen.
I chose a different pattern for the master bathroom. I still have other things to fix up, but I will show that later.

Saturday, January 9, 2010

Ceiling-ology 101

Probably the most unique feature of a Terra-Dome style home is the domed, concrete ceiling. Concrete is not normally used for ceilings in a home, and there are probably good reasons for that. As you can see above, it leaves a lot of air bubbles, form lines, small cracks, and a bit of discoloration. I have to admit, I don't remember even looking at the finish on the ceilings of the other houses we toured before we built ours. I remember one builder telling us how he trowel finished the ceilings with a product called structo-lite. I tried to find it, but it was not locally available, and I didn't want to buy it over the Internet. Anyway, I knew I didn't want to spend my time hand troweling, or paying someone to do that much work. Unlike the walls, I did not want to make the ceilings smooth. I tried to find another way. Below are the results of my experiments.
The first attempt was made when we had a deadline for the 4th of July party last year. I was able to hire a crew of 2 to spray on a drywall mixture for about 1/2 of the house. It looks OK, but it did not fill in the air holes very well. It wasn't cheap either. I will eventually have to go back and fill in all of those holes by hand.
My next attempt was to stay on the floor and use a long pole to roll on Dry-Lock waterproofing paint. I put on 2 coats because the first coat was too thin to hide the color of the concrete. The truth is, I may need to put a third coat someday, but it looks pretty good otherwise. The problem is that it looks like I couldn't decide between a smooth and textured look, so it does neither very well. It also left a lot of air holes unfilled.
My final technique involved putting one coat of Dry-Lock to seal the concrete, and then getting on the scaffold to use a 4" brush to apply a textured ceiling paint. I like this the most. It fills in almost all of the little air holes, smooths out a lot of the form lines, and was not expensive. It was time consuming, but once I got into a rhythm, it moved along nicely. The hardest part was lifting my arm above my head for so long. I guess it really wasn't that much different from hand troweling after all.

Sunday, December 27, 2009

No more exposed concrete

This shot shows our bedroom carpet, that was installed a couple of months ago, preparing to meet the carpet in the rest of the house. I know they don't exactly match, but it works. We have had exposed concrete floors for many months, and it was nice to finally cover them up.
In addition to the carpeting, we wanted laminate in the dining room area to make it easier to clean up food messes when we have the whole clan over. I spent a bit more than I wanted, but this was the best looking laminate I could find, and nothing else came even close. I doubt the pictures will do it justice. I had some help with the first day of installation, but I finished the 2nd day by myself, at 5 am after pulling an all-nighter. It takes longer than you would think, although it is not complicated. Fortunately, I only had a few tricky cuts and they came out fine.
Notice the large sheet of plastic. You have to do this over concrete. One of the things I liked about this laminate is that it comes in 3 different lengths, giving it a more wood like layout and appearance, with randomly staggered joints. That thing in the corner is for our wood stove, which will be installed later.Here is the finished product, all bordered and ready to use.

Here is the entire living room with it's new flooring. The cats seem to approve.

Friday, December 25, 2009

Sleepover, Anyone

Once we have finished the bedrooms we sleep in, it was time to work on the Guest Room. Over the months, we had done a little work here and there. As you can see above, we had the first coat of drywall mud on the concrete wall, and of course the drywall was in. I also had installed the closet shelves. This is the only bedroom with a closet on a concrete wall. I decided to put a 2x4 across the back wall to attach the shelves to since that was easier than drilling lots of little holes in the concrete for all of the support clips. I did drill into the concrete for the lower support brackets, and I can assure you, these shelves will buckle under a heavy load long before the supports come loose from the wall.
You can also see how we filled in the space between the drywall and the concrete ceiling. We simply toke more drywall mud and pushed it into the gap, and slid the trowel along the ceiling line to smooth it out. The hardest part was getting up that high. I had help from one of my sons (he knows who he is) that came down one Saturday to give me a hand.I was finally able to hire a small crew to do some finish work on the remaining drywall before the final push to get the house ready for our appraisal at the end of the 2 year construction loan (more on that later).

I actually overcame my fear of getting on the scaffold and finished the guest room. I believe it has the best ceiling of any room in the house.

This is the finished product. We were able to get carpeting put in the rest of the house, including this bedroom, and I put in all of the baseboards and trim on the doors. I guess eventually, I will put doors in the closets, but not for a while.
Notice the little alcove on the left. This is the result of butting up against a concrete wall which is 10 inches thick, with a stud wall that is less that 5 inches thick. I think I will put some shelves in there for books and stuff.